


This is an installation guide for AmiTCP 3.0b2 which can downloaded from funet or directly from here.
Because the installation script for AmiTCP 3.0b2 is a bit buggy and requires a bit of manual work, we decided to make this guide. We have tried to make each step in this guide as clear as possible so there is a lot of pictures, but don't be afraid, most of the steps will be passed in a matter of seconds.
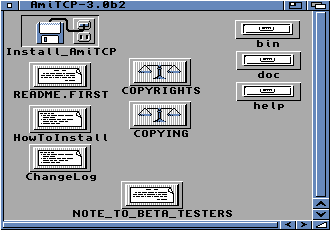
Preparations| 1. Open the AmiTCP-3.0b2 directory and doubleclick the Install_AmiTCP icon. | |
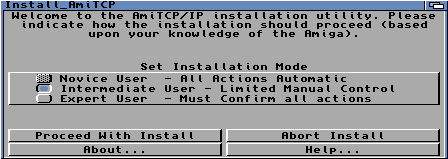
| 2. Be sure to select Intermediate User and click Proceed With Install | |
| 3. Click Proceed | |
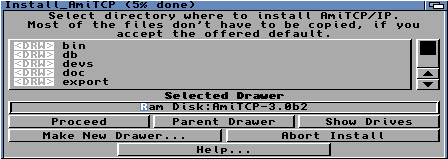
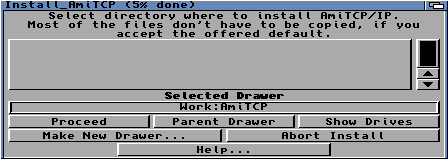
| 4. Now you need to select where you want to install AmiTCP on your harddrive. | |
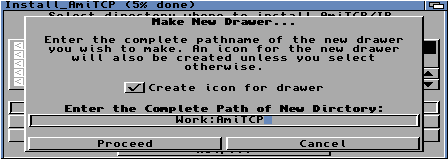
| 5. Be sure to create a directory because the installer doesn't do this for you. | |
| 6. Once a directory is created and selected just click Proceed. | |
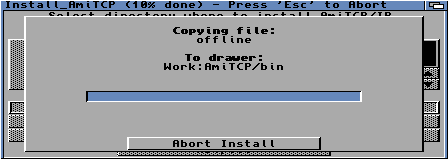
| 7. Wait while the installer copies some files. | |
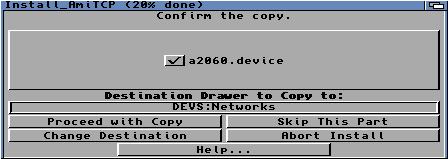
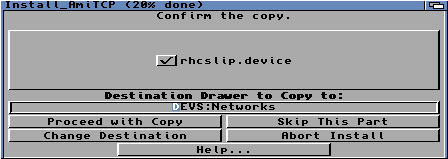
| 8. It's easiest if you just install all network devices, but you can deselect the devices you don't need if you want to. | |
| 9. Just click Proceed with Copy. | |
| 10. Just click Proceed with Copy. | |
| 11. Just click Proceed with Copy. | |
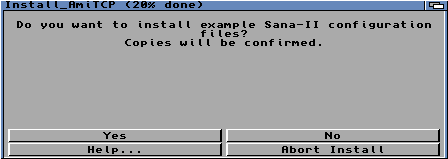
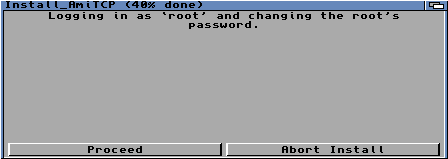
| 12. Click Yes. | |
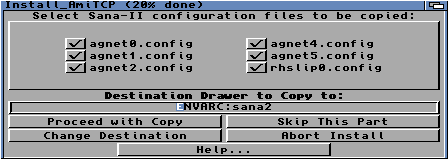
| 13. Click Proceed with Copy. | |
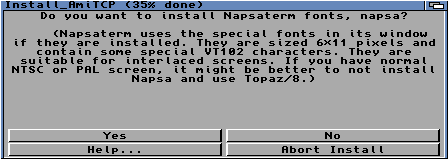
| 14. Click Yes. | |
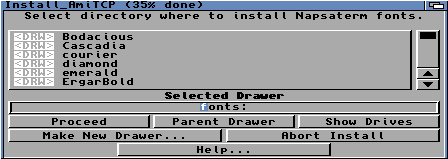
| 15. You want to install the Napsaterm font in fonts:, so just click Proceed. | |
| 16. Click Proceed. | |
| 17. Here's a little bug in the installer script - press enter in this window once and then close it. | |
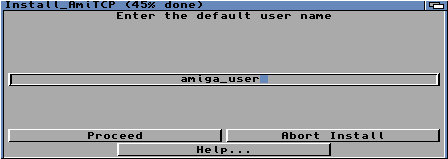
| 18. Here you need to choose a username for the default user. It doesn't really matter what you choose, but don't use any spaces and be sure to remember it. | |
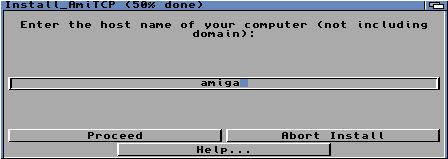
| 19. Enter your hostname, anything will do. | |
| 20. Enter the domain part of your hostname. Anything will do, really. | |
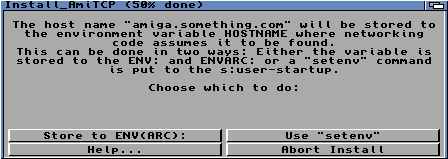
| 21. Click Store to ENV(ARC):. | |
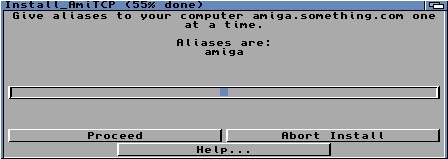
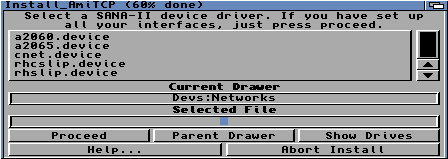
| 22. There is no need for any more aliases for your host, just click Proceed. | |
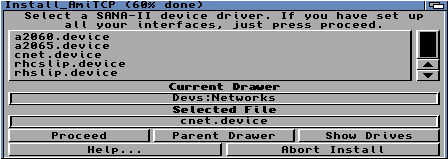
| 23. Now select the SANA2-device for your network card you previously copied to Devs:Networks/ and click Proceed. | |
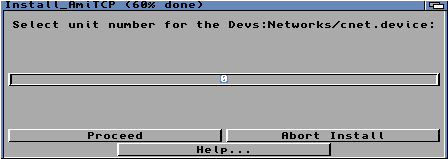
| 24. Unless you have several identical cards in your system, enter 0 and then click Proceed. | |
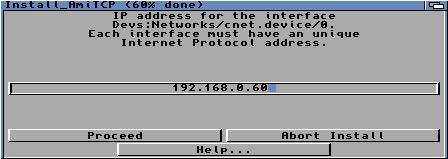
| 25. Enter the IP address you want your Amiga to have on the network, then click Proceed. Make sure no other computer has this address, or else it will not work. | |
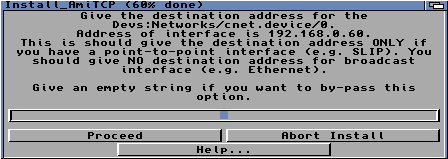
| 26. This part is only needed for PPP/SLIP connections so you shouldn't enter anything. Just click Proceed. | |
| 27. Enter your netmask for the network - normally 255.255.255.0 and then click Proceed. | |
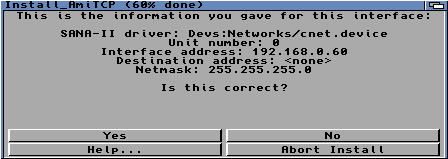
| 28. Make sure that everything is correct and if it is, click Yes. If something is wrong press No and redo it. | |
| 29. We have already installed the only SANA2-device we're going to use so don't select anything and just click Proceed. | |
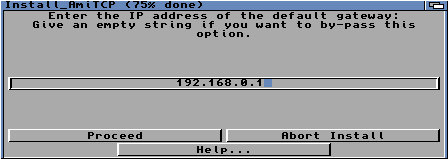
| 30. Enter the IP Address of your default gateway. The gateway is often called router. When done, click Proceed | |
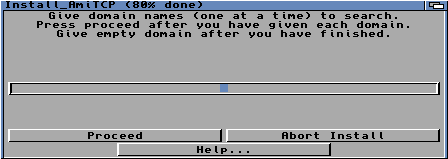
| 31. We don't need any default domain names for hosts. Just click Proceed. | |
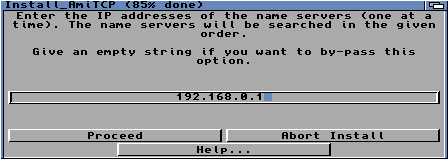
| 32. Enter the IP Address of your first or only name server (DNS). Then click Proceed. | |
| 33. Enter the IP Adress of your second and name server following, one at a time. When you have entered all your name servers, just leave the line empty and click Proceed. This means that if you only have one name server you should click Proceed here directly. | |
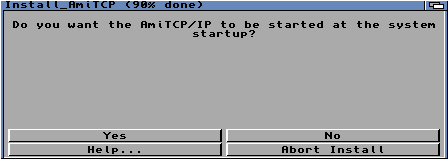
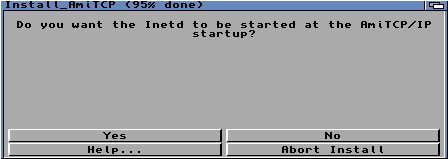
| 34. Click Yes. | |
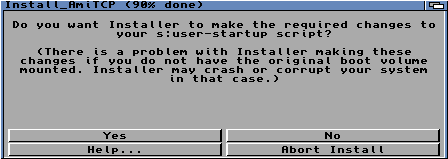
| 35. Click Yes. | |
| 36. Click Yes.. | |
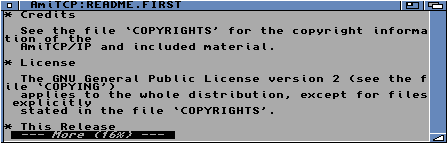
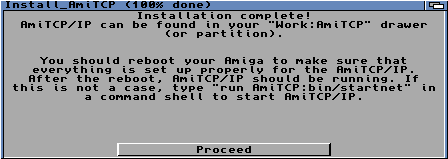
| 37. If you want to you can read the README.FIRST file, otherwise just close the window. | |
| 38. Now the installer is done, but don't reboot your computer - you need do to do some text file editing first. | |
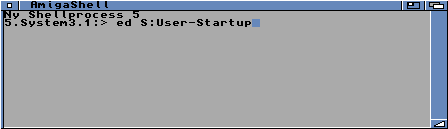
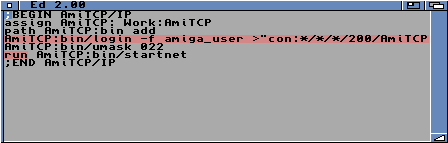
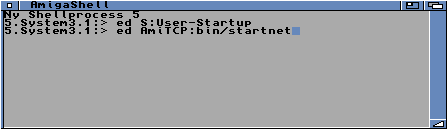
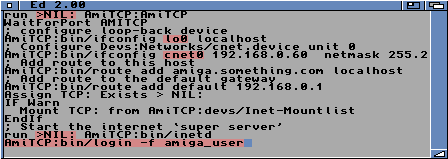
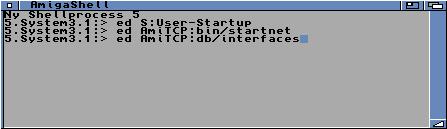
| 39. Open a shell and type ed S:User-Startup (or use your favourite text editor). | |
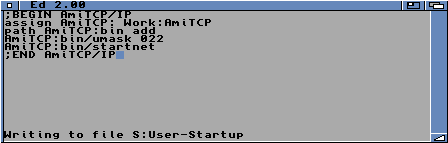
| 40. Find the AmiTCP section in the file and remove the marked parts. | |
| 41. The file should now look like this. | |
| 42. Be sure to save the file and then exit the editor. | |
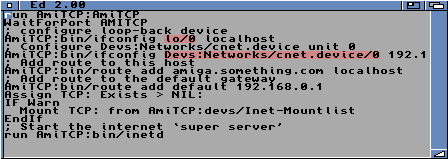
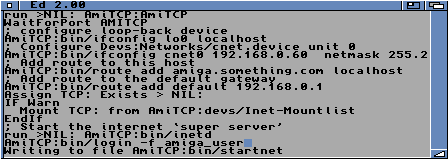
| 43. Go back to the shell and type ed AmiTCP:bin/startnet. | |
| 44. Remove the marked parts. | |
| 45. Then add the marked parts. The interface name cnet0 can be whatever you like as long as it doesn't contain any digits, except the number at the end which corresponds to the unit-number you are going to use for the SANA2-device for your network card, which is 0 in our case. | |
| 46. Make sure you save the file to disk, then exit the editor. | |
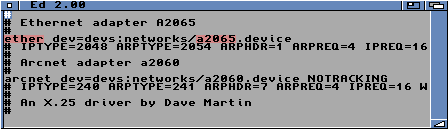
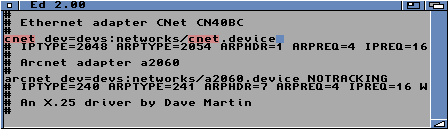
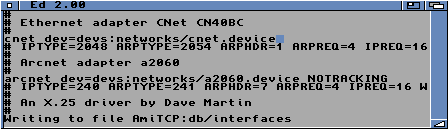
| 47. Go back to the shell and type ed AmiTCP:db/interfaces. | |
| 48. Remove the marked parts. | |
| 49. Then add the marked parts - first the interface name you entered in the previous file, but without its last number, which equates to cnet in our case. Secondly enter the name of the SANA2-device you copied before starting the installation, which is cnet.device in our case. | |
| 50. Make sure you save the file to disk, then exit the editor. | |
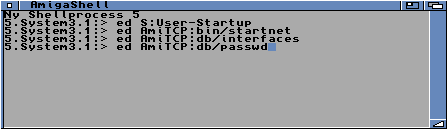
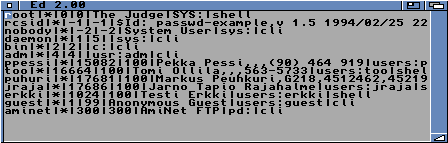
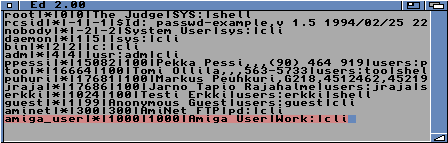
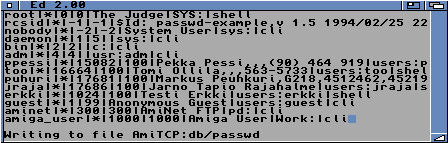
| 51. Go back to the shell and type ed AmiTCP:db/passwd | |
| 52. The file looks like this before you change it. | |
| 53. Add the marked line. The only thing you should make sure is that where we entered Work: you should make sure a valid path which exists on your system is entered. | |
| 54. Make sure you save the file to disk, exit the editor and then reboot your computer. | |
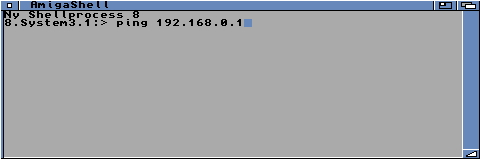
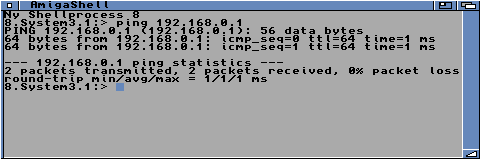
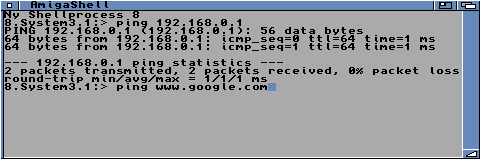
| 55. If everything was done properly your Amiga should have booted without any problem. Now let's make sure that the everything really is working as it should. Open a shell and type ping and the IP address of your gateway - 192.168.0.1 in our case. | |
| 56. If your local net is working you will get replies from the gateway. Break the ping by pressing Ctrl+C. | |
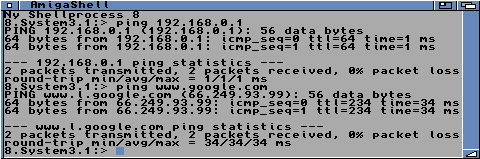
| 57. Now let's try to ping an Internet host. Type ping www.google.com in the shell. | |
| 58. If you get replies everything is working! Yay! :) | |
If something goes wrong during your startup the easiest way to get Workbench up and running again is to boot without Startup-Sequence and edit your S:User-Startup. Comment out all the lines in the AmiTCP section by adding a ; in the beginning of each line. Once Workbench is up and running again, double check the text files you have edited.
If your Amiga starts up okay but you can't ping your gateway, make sure the cables connected and that your gateway can answer to pings from another computer. Also make sure that the IP address and netmask are correct. You edit your IP address and netmask in the AmiTCP:bin/startnet file.
If you can ping your gateway but no Internet hosts, make sure that the default gateway and name servers (DNS) are correct. The IP address for your default fateway is found in AmiTCP:bin/startnet and the name servers are found in AmiTCP:db/netdb-myhost.
This guide was made by Patrik Axelsson (patrik) and David Eriksson (fx).